
March 26, 2017
Snow Creek (see map) is the most well known route on the north face of Mt. San Jacinto, a giant behemoth of rock and ice that rises from the desert at 1,000 to 10,800 ft in a few miles distance. The north face has captivated mountaineers for generations, being comparable to other major alpine climbs in the country. The rich history of this face is strewn with stories of excitement, inspiration, and horror. Out of all the major known routes on the north face, Snow Creek is one of the easiest from both the physical and technical perspectives, a testament to the extreme difficulty of this side of the mountain. This would be my second time on the north face, the first of which was Folly Ridge in 2015.
Getting to the trailhead: Take I-10 east, 6 miles past Cabazon, and turn right onto CA 111. Travel 1 mile on CA 111, then turn right (south) onto the paved Snowcreek Canyon Rd. Travel 1.2 miles on Snowcreek Canyon Rd to a well lit utility station.
Trailhead coordinates (lat/lon): 33.8987, -116.6798
Reaching just the start of the proper Snow Creek route requires some careful navigation. The approach starts from a utility station (1,180 ft) on the east side of Snow Creek Rd in Snow Canyon, then heads southeast across the desert floor for about 1.2 miles to the toe of Blaisdell Ridge, a broad semi-rocky ridge dominating the eastern side of Snow Canyon. After ascending Blaisdell ridge to an elevation of ~4,300 ft (at the bump labeled "4,340" on the USGS 7.5' topo), the route veers SSW along the west slopes of Blaisdell Ridge, dropping gradually towards Falls Creek and The Isthmus, the narrowest strip of a separate north-to-south-running ridge dividing Falls Creek and Snow Creek. After crossing Falls Creek (4,080 ft) and ascending to The Isthmus (4,240 ft), the route heads southwest along a slope, remaining 200-300 ft above Snow Creek which can be heard roaring away to the west. At 4,730 ft, the route drops briefly into a relatively large canyon with a creek strewn with large granite boulders. This is not Snow Creek, but a side canyon which eventually narrows significantly higher up into a couloir known as "Kristen's Cleavage." After heading through the Cleavage for about a tenth of a mile, the canyon makes a sharp left turn and is blocked by a large craggy waterfall. Now its time to exit the Cleavage by bushwhacking southwest for a few hundred feet of distance up to a broad saddle (5,140 ft). After climbing up and over this saddle, one finds themselves finally standing in the large canyon of Snow Creek. Here the fun begins.
It was 3:30 am as Gus, Mason, and I started across the desert floor at a brisk pace with headlamps, walking against the usual persistent Snow Canyon wind which I knew would cease higher up. We eventually reached the toe of Blaisdell Ridge, starting up one of the many folds of the ridge which dropped onto the desert floor. Since all the folds eventually converged, our precise direction of ascent wasn't too important as long as we kept going up. The terrain was mixed shrubbery, sand and rock which was pretty easygoing. To the north, we could make out a light on the crest of the San Bernardino Ridge which was over 20 linear miles away at an elevation of ~10,500 ft. Evidently we were not the only ones getting in our alpine starts today.
At 3,200 ft, the ridge flattened out and began ascending at a significantly more gradual rate then it had been. By first light, we had reached Point 4340 where we were to begin sidehilling SSW towards Falls Creek and The Isthmus. We stopped for a break and I took a long exposure shot of the north face.

I had the initial impression that the sidehilling section would involve a good deal of bushwhacking, but was pleasantly surprised to find that it wasn't so. Although the bushwhacking did somewhat increase closer to Falls Creek, it was light overall.

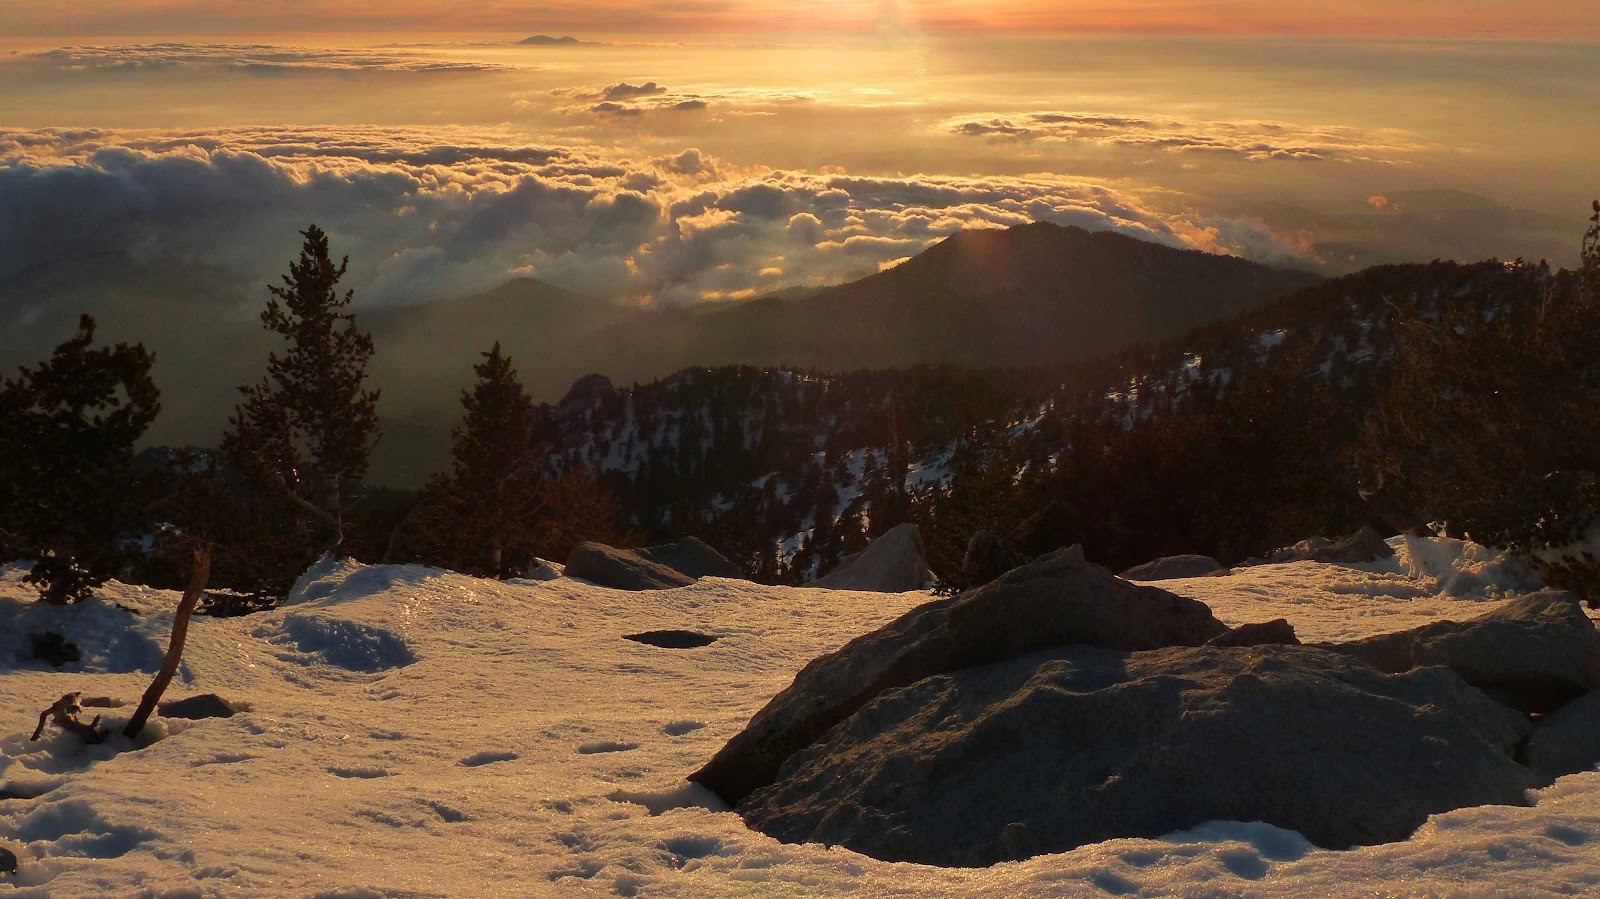
sunrise on the upper mountain

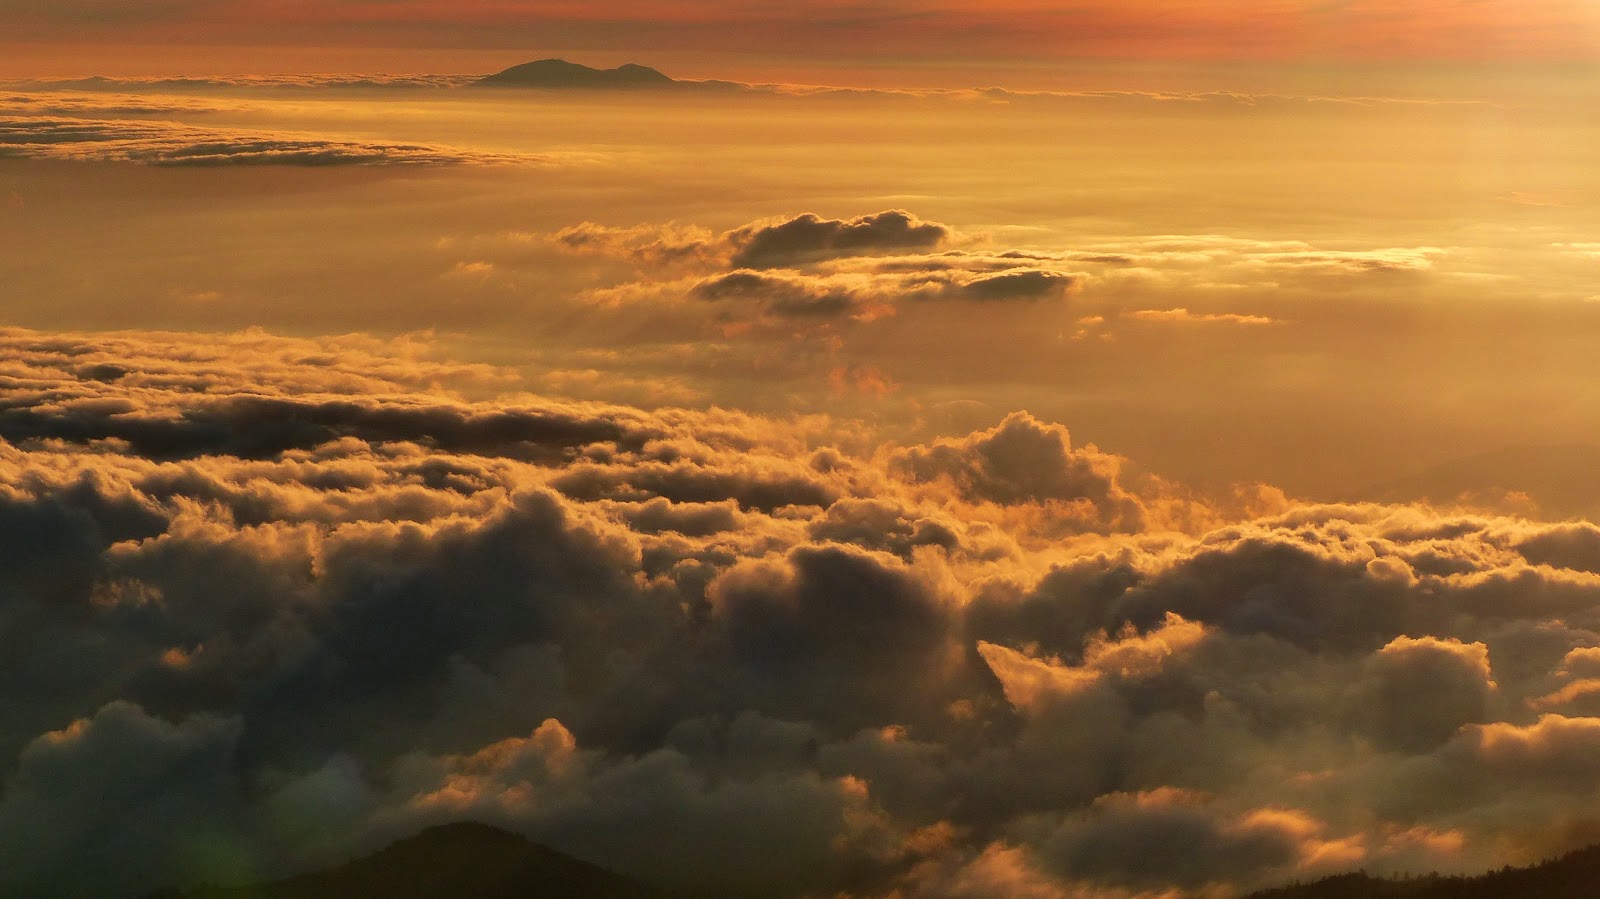
clouds over Gorgonio Pass

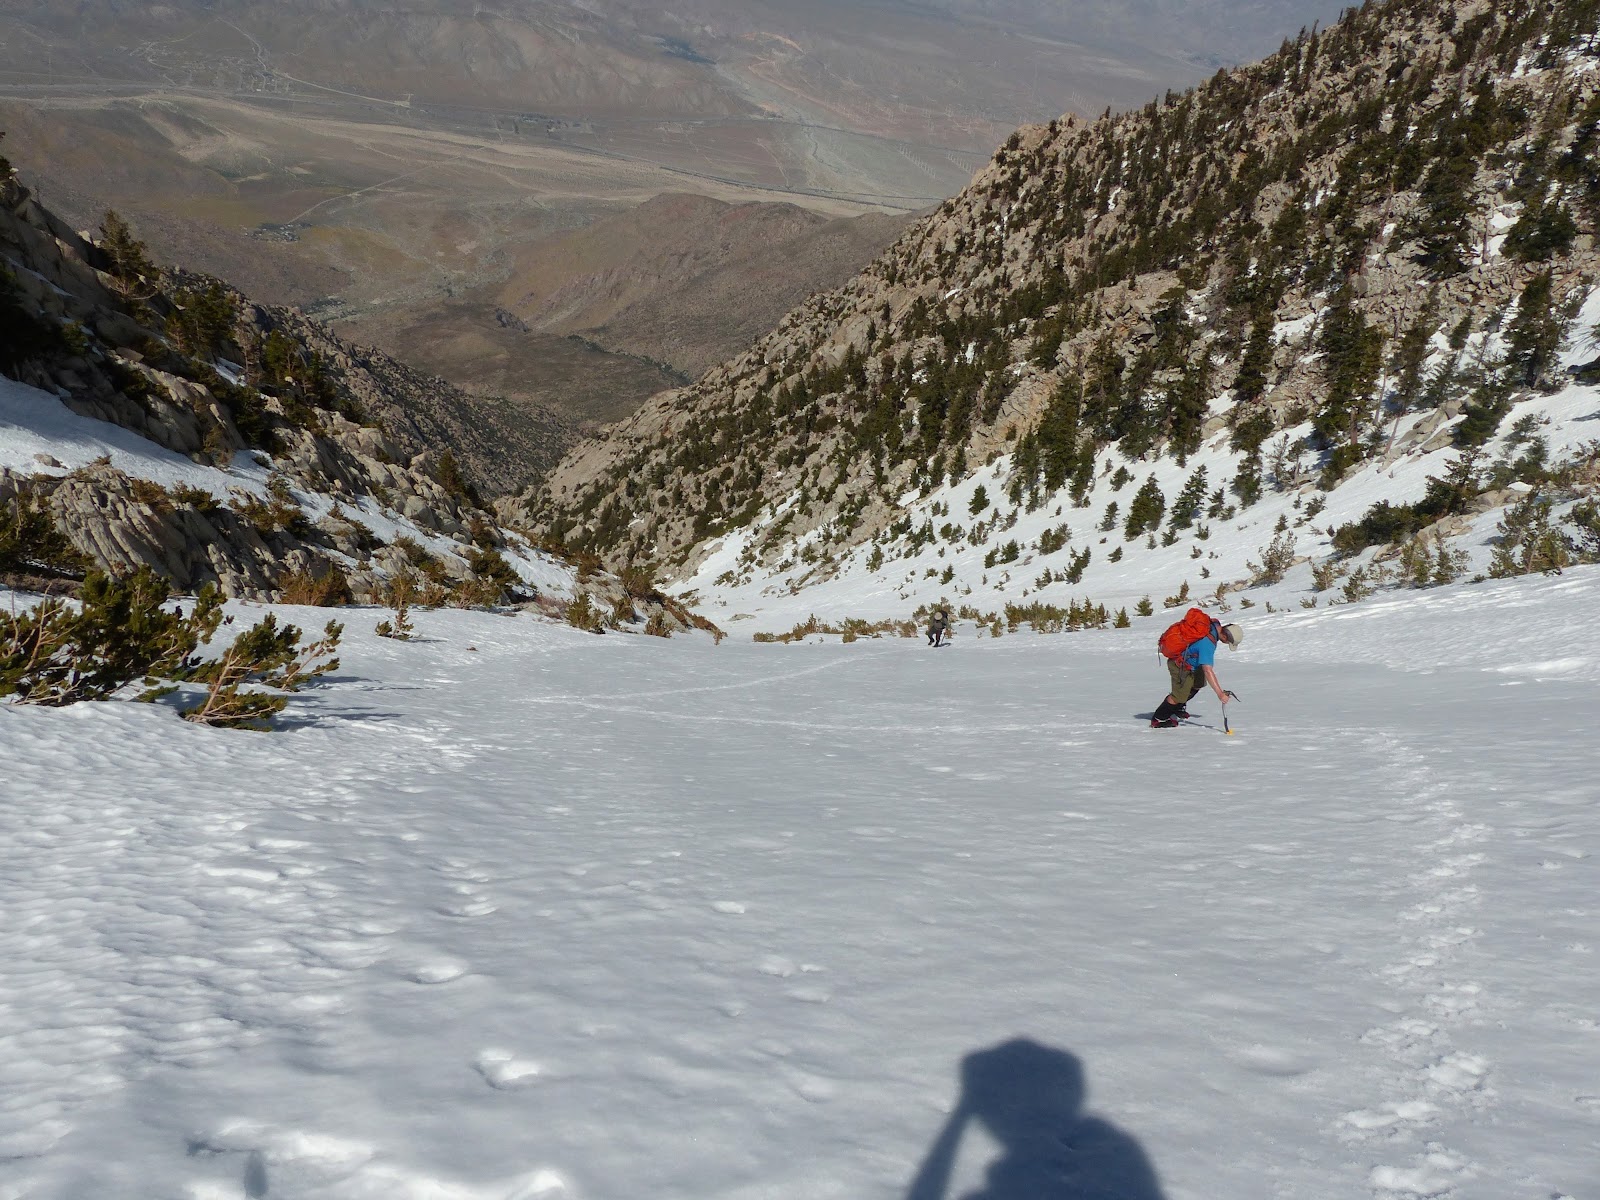
dropping to Falls Creek

We took another quick snack break at the creek, which contained good flow, but not super swollen so crossing it was a simple rock-hop across.

The brush increased somewhat while ascending to The Isthmus, but it was still very manageable. As we started sidehilling after (southwest of) The Isthmus, the brush increased briefly and then thinned again.
Mason gets his pack stuck in a short semi-nasty section

By 8:40am, we had made it to the short rock-hop through a 0.1 mile section of the Kristen's Cleavage canyon. The saddle which we were to climb up and over into snow creek was very visible to the southwest above where the Cleavage drainage made an abrupt left turn.

Climbing out of the canyon and to the saddle was short and loose. Some people have called it class 3, but I would be hard pressed to call it so. It felt like pretty standard class 2 scrambling through brush and dirt with the occasional boulder.

view from the saddle

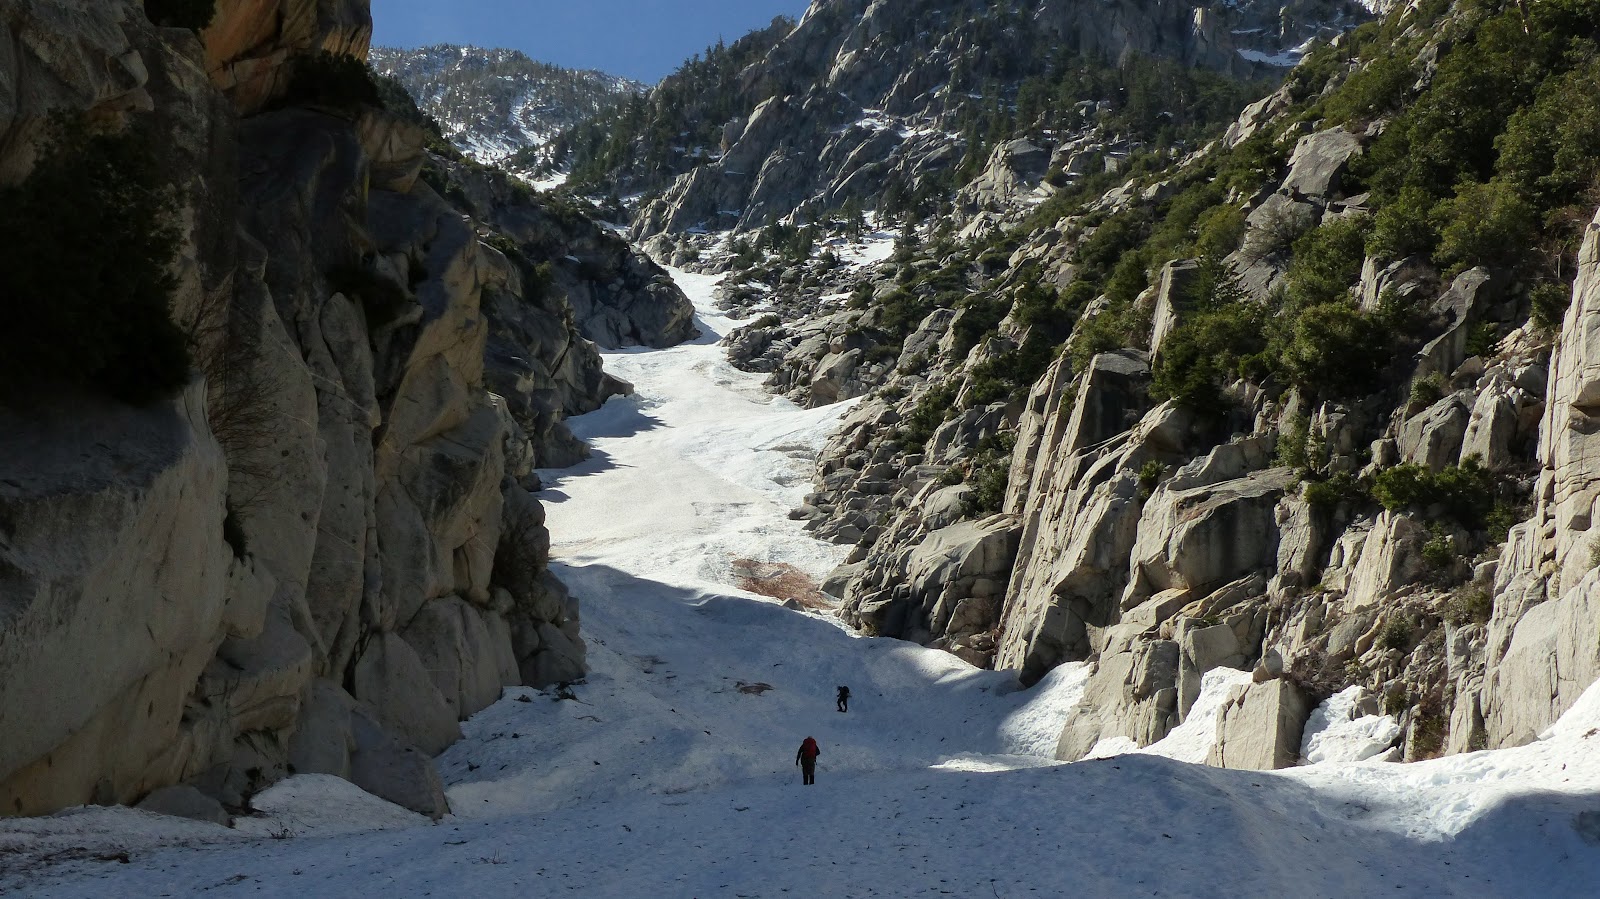
Snow Creek at last!


A little bit of bushwhacking brought us into the true Snow Creek canyon, the floor of which was composed of an assortment of giant boulders jumbled about. We continued up the canyon up and around boulders, admiring the grand composition of the place.

Not too long after, we reached the famous chockstone (5,740 ft). There were two ways of getting around this feature. The classic route (class 5.4-5.5) involved climbing the canyon wall 30 ft before the chockstone, on the right side. Another class 3 route involved heading up a brushy chute 100 ft before the chockstone and ascending roughly 50 ft above the canyon before dropping back down through the brush. This route was also on the right side.

classic route shown (I forgot to take a photo of the class 3 route, but finding it is fairly obvious)

The three of us started up the classic route together. After a few moments, Mason decided to double back and take the other route, deciding not to risk frictioning with his stiff clunky boots.

The first 20 ft of climbing involved a very secure crack, followed by a gradually upward sloping traverse across the wall. The scariest part came at an exposed downward sloping ledge/slab which was about 2-3 feet wide and 7-8 ft in length. The wall above this ledge was smooth, so we had to put full trust in our shoes sticking to the rock.
Mason heading down the initial 20 ft crack

looking back down at the ledge/slab

Shortly after the ledge, we climbed around a corner to find ourselves safely above the chockstone. A large slab ran along the right side of the canyon: a perfect place to stop and put on crampons. A few moments later, we heard some shouts from above indicating that Mason had made it up the class 3 route, reporting brush and boulders.
With crampons on and axes out, we finally hit the canyon, walking on hard crunchy snow. The stark contrast of the grand granite canyon walls, snow, and desert were a sight to behold.
“The pines sing joyously above us. As we see the bare ledges of the granite above, capped by the snow-streaked summit, we cry Excelsior!” -George Wharton James, who climbed Snow Creek in ~1900


The snow started off at a gradual 20-25 degree angle, which slowly increased to 40 degrees over the next quarter mile. The angle would not fall below 40 degrees for the remainder of the route.


At 6,500 ft, we made it to the first major junction of couloirs, taking the left fork. All major junctions and turns that were taken is as follows:
6,500 ft LEFT
7,500 ft RIGHT
8,400 ft RIGHT
9,100 ft LEFT
the 6,500 ft junction


Up, up, and up we went, zigzagging up the snow. I initially thought the snow would turn to a posthole nightmare later in the day, and was surprised to see it only soften slightly in the afternoon and actually consolidate more higher up.

the 8,400 ft junction

the 9,100 ft junction, with the end looking deceptively close

Above 9,000 ft, the snow became very solid, and I had to step more forcibly to dig in the dull crampons (A much better pair which I had neglected to bring were sitting at home). With a slope of 45 degrees, this was quite a workout on the ankles. We stopped to take a food break at 9,500 ft, looking up at the increasing slope and what appeared to be solid blue ice in the couloir.


Above 9,500 ft, patches of solid ice indeed began to appear. In some places, the ice was covered with a thin 1-2 inch layer of graupel, which would sluff off as soon as we made contact with it. At 10,200 ft, we could see that the 50+ degree couloir ahead was almost entirely filled with solid blue ice. Since Mason had his two ice tools with him, he continued up the couloir before heading to the right for a more direct approach to the summit. Gus and I, with our clunky "snow axes," headed slightly left into a smaller couloir with more trees. I was hoping that the warmth of the trees would result in less freezing overall, and that turned out to be [mostly] the case.
Mason chops his way through the ice


Eventually, even the trees didn't stop the persistent ice. I then began a tedious (but very safe) way of climbing up the ice: chopping large foot and hand holes in it with the axe. This was a very slow methodical process which tired out my arms greatly, but it worked very well. It took about an hour to gain the remaining 200 ft of elevation this way. The 55 degree slope was actually a good help to me, making it so that I wouldnt have to lean down as much to chop.
Gus climbing the solid ice (with chopped holes visible in front of him)

obligatory Gorgonio shot

Mason on the home stretch

At ~6:30, Gus and I heard a "WOOHOO!" in the distance which indicated that Mason had topped out at the summit. After a few more chops, we arrived on level ground just east of the summit, and walked over to it. By 6:40, all three of us were standing at the summit, tired and jubilant, congratulating eachother on the successful ascent.

Even after 38 times on this summit, the view never gets old


We left the summit shortly before sunset, hustling down the eastern slopes of the mountain. Due to darkening skies and possible navigational concerns, we had a brief debate of whether to take the standard route or Sid Davis route down to the tram, and ended up choosing Sid Davis, the popular winter route that the ubiquitous "San Jacinto Peak from the tram" hikers use. Having done this route several times before, it was not difficult to navigate it in the dark. As long as we kept Cornell Peak to our left and the Sid Davis drainage to the right, all was well. We reached the tram at 9pm, 2 hours after leaving the summit.
Final Stats
11.8 miles
11,000 ft/3,670 ft gain/loss

Weather Forecasts
Trailhead
3,500 ft
5,600 ft
7,500 ft
10,500 ft
summit (from MountainForecast)
Peakbagger Pages
Mt. San Jacinto
Summitpost Pages
Mt. San Jacinto
Other
Mt. San Jacinto message board
Webcam at 8,000 ft elevation near upper tram station
Palm springs Aerial tramway website
Palm Springs Life Magazine article on the north face
Bob Burd's report on Snow Creek (using a different approach)
Bob Burd's report on Snow Creek (using a different approach)
This is great... thanks for the beta! I'm heading up there this weekend for what looks like perfect conditions.
ReplyDeleteGreat to see the shots near the top of the route! Boarding down that chute on Sunday and now I wish I could've made it up there a couple weeks ago. Have you ever climbed up Rabbit Ears Couloir? I've been staring up that chute a long time but haven't attempted it. Hoping maybe this fall after the ice is all gone.
ReplyDeleteThanks!
Rob
The only routes Ive done on the north face have been Snow Creek and Folly Ridge. I hope to eventually check out Rabbit Ears Couloir and prepare myself with some ice tools. The top of the couloir looks like some decent mixed climbing.
DeleteYeah it looks like a great challenge for September! It was pretty sketchy boarding down the face that day. We had to take it slow, but it was fun as always! Here's a vid if you're interested...https://www.youtube.com/watch?v=KlccSWcNfiQ
Delete"Kristen's Cleavage" can be followed upward until it ascends the center of the north face of the prominent peak on the ridge east of the east fork of snow creek. I named this peak "Kristen Peak" after my newborn daughter in 1970.
ReplyDeleteMike Daugherty
I first found out about that couloir in 2011 when I met two climbers at the summit of San J. They had ascended Snow Creek earlier that day and mentioned a handful of other north face routes (including "Kristen's Cleavage") that they wanted to try out. I heard that name again a year later after running into a group near Marion Mountain. As far as I know, the route has not even been attempted.
DeleteI climbed it several times in the early 70s. It is not technically difficult if you stay to the left (east) in the main couloir and avoid the large rock tower to the right.
DeleteNice post, Eric. Very impressive. I look at that north face every time I drive by, and wonder where the route is. Your pics with routes overlain is excellent. Well done.
ReplyDeleteMike M, Riverside, CA
I plan on doing it myself very soon, you said you did it in March is that the best time to go you think?
ReplyDeletei PLAN ON DOING THIS MYSELF ANY ADVICE
ReplyDeleteGreat pictures, and review of this memorable climb. It brought back a lot of great memories.
ReplyDeleteI climbed it with a friend back in March 1985. No pictures back then to guide us, just topo maps, and hunches.
You did a wonderful job with these pictures.
It took me back 35 years. We started at dawn, 6am at the end of the dirt road, reached the top at 7pm, and took the tram back at 9pm.
What a magnificent hike, and steep snow and ice climb.
Keith D.